Automation
- Short description
- List of actions
- Download links
- Select files
- Select in the folder
- Create a folder
- Create screenshots/screenlist
- Cut a sample from multimedia files
- Multimedia converter
- Mediainfo template
- Calculate MD5
- Change MD5
- Pack into a RAR archive
- Pack into a ZIP archive
- Unpack archive
- Unpack to folder
- Bulk file renaming
- Move to another folder
- Remove files
- Upload to the file exchanges
- File Search
- Generate text from a template
Short description
The concept of automation is based on drawing up a plan of actions that will be carried out sequentially.
An action always has parameters (variables) that are supplied to the input and those that are obtained at the output as a result of performing the action. Actions are building blocks from which you make your plan.
Variables or parameters can be of different types. These can be links, files, or texts.
"Files" is a common type for files and for folders. Later, as a result of performing actions, there may be variables of the "files" type at the output, but already with the "folders" subtype. I.e., a specific class of "files" is specified.
"Texts" can be of two types, just texts and "posts". The posts will be displayed in the Automation posts viewer (see below), but there will be no simple texts. They can be used to send other actions to the input.
Description of interface elements
- Click on the "Automation" tab
- List of automation plans
- A list of actions in the selected automation plan
- The button for clearing successfully completed automation tasks
- The button for clearing automation tasks completed with errors
- Button for stopping active automation tasks
- The button for restarting automation tasks with errors
- The button for starting automation tasks with errors from the place where they were stopped
- The button for clearing automation tasks with the deletion of all temporary files created during execution
- Switch the number of automation tasks performed simultaneously in parallel
- The button for displaying ready-made posts
- List of current automation tasks
- The button allows you to view the contents of all parameters (variables) at the current moment of the task. Convenient for debugging
- The counter shows which action number the task of completing the automation plan is on. If an error occurs, you can use this counter to determine the action number in the plan where the error occurred.
- On the left side of each action, the parameters accepted by the action (submitted for input) are displayed.
- On the right side of each action, the final parameters (execution results) are displayed

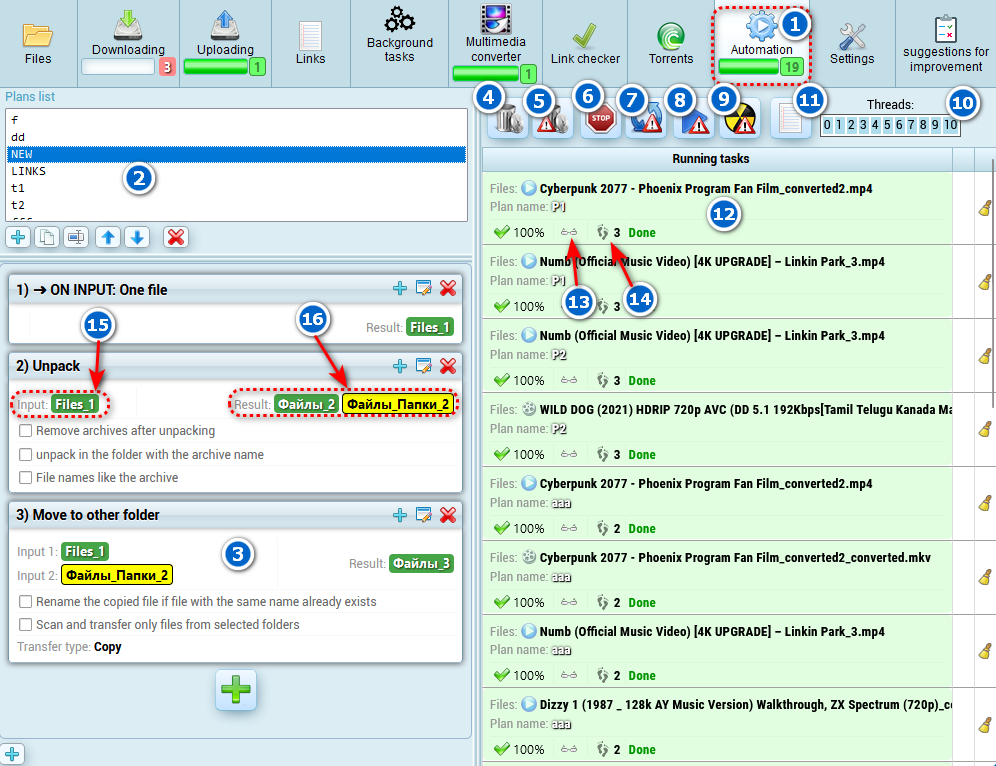
Adding actions to a plan
The first action in the plan determines the place where you can run it for execution.
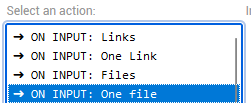
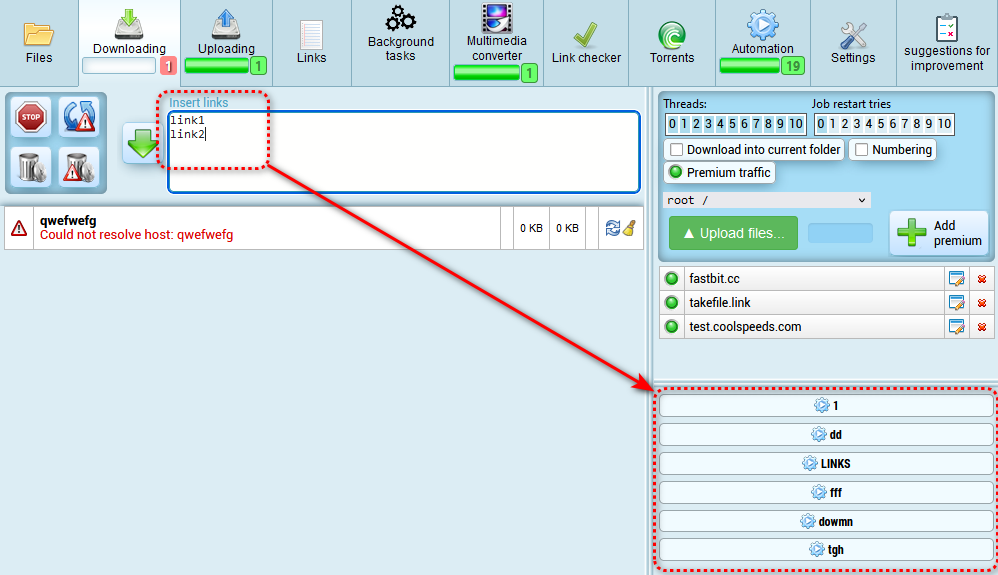
If the first action is to do "LOG IN: Links" (or "One link"), then you can launch this plan on the download tab of the service. The inserted download links will be transferred to the input of the first action of the plan.
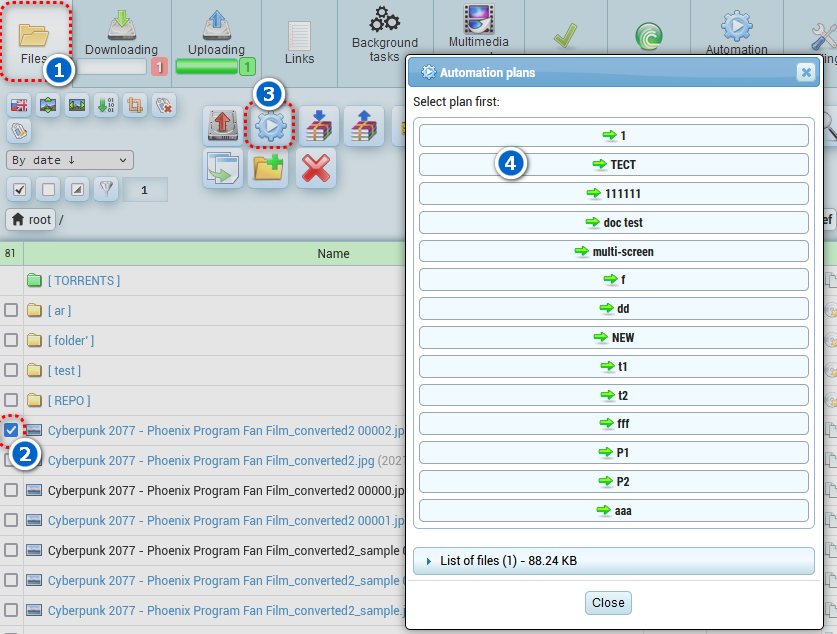
If the first action is to do "INPUT: Files" (or "One file"), then you can run this plan on the Files tab of the service. the selected files will be transferred to the input of the first action of the plan.
- If you select "Files" or "Links", then if you run the plan on a set of links or files, they will all be immediately transferred as a list to the input of a single task. For example, you have selected 10 files and launched a plan, one automation task will be launched, which will process all 10 files at once.
- If you select "One link" or "One file", this means that you do not want the plan to process many files or links at one time, but you want it to process each link or file individually (i.e. in parallel). Then each link or file will have its own separate automation task running. For example, you have selected 10 files and launched a plan, 10 tasks of this plan will be launched in parallel, each task will process one of the 10 files.
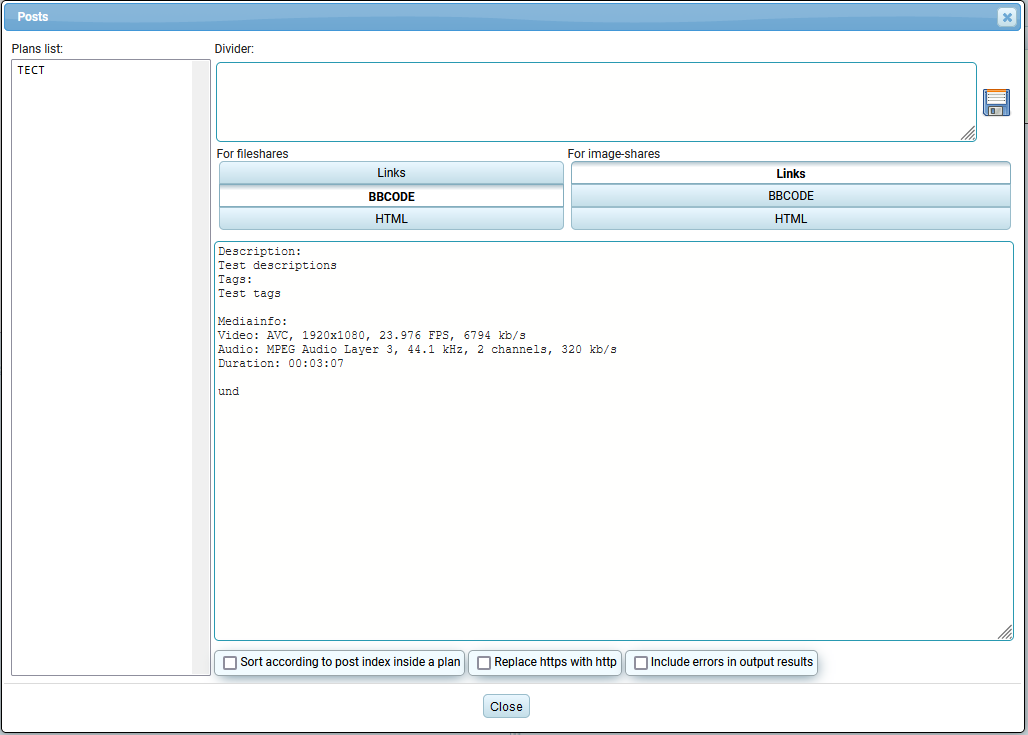
Viewing automation results (posts)
If there was an action ‘generate text from template’ or ‘generate post from file history’ in the automation plan, the result of these actions can be viewed in a separate window when you click on the button in the form of a list.
Here you can select posts by the name of the automation plan. You can select a separator - text to be inserted between posts to separate them from each other. You can also choose the type of formatting of links separately for exchangers and for photo exchangers.
List of actions
Download links
If the first action in the automation plan is “INPUT: Links” or “INPUT: One Link”, then you can add the “Download Links” action. It will be necessary to select the links that were submitted for input and the folder where the files should be downloaded.

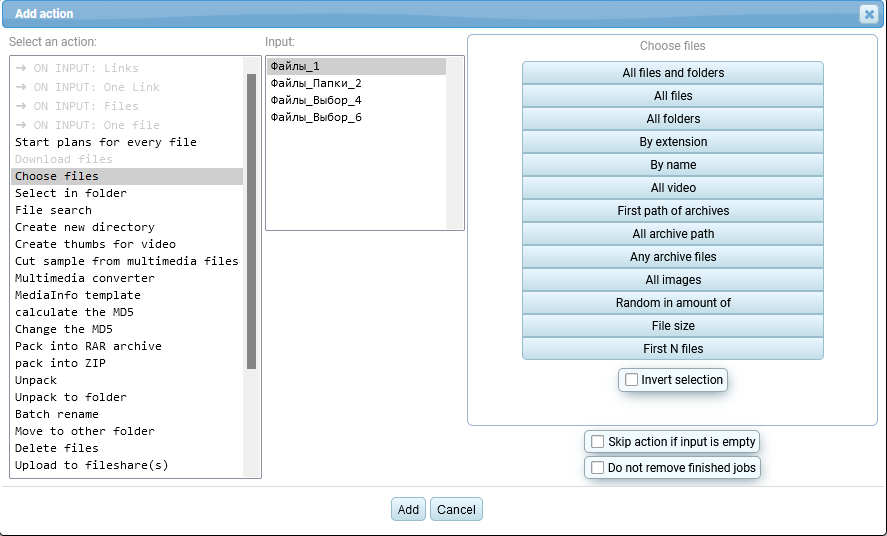
Select files
This action allows you to filter (select) from the input file list those files that meet the necessary conditions.
- All files and folders - all files submitted to the input is output as a result (makes no sense).
- All files - selects only files, ignores folders
- All folders - selects only folders, ignores files (the output variables will have the subtype ‘folder’).
- By extension - selects only those files that have the same extension that can be specified.
- By name - selects only those files and folders whose name contains the required text string that can be specified.
- All video - selects all video files
- First parts of archives - selects the first volumes of multivolume archives
- All archive parts - selects all parts of multi-volume archives
- Any archive files - selects all files belonging to archives
- All images - selects all images
- Random in quantity - selects random files or folders from the input, the quantity can be specified.
- File size - allows you to specify an expression, if it is met, the selection will be made (see below).
- First N files - selects the first N files from the list of files or folders passed to the action, the number can be specified.
Applying the ‘File Size’ filter
For this filter, you can write an expression with conditions regarding the file size, to select files according to their sizes.
The following variables can be used in the expression, which will be replaced by the corresponding numeric values
[file_sum] - the sum of all files passed to the action input
[file_max] - size of the largest file of all files passed to the action input
[file_min] - size of the smallest file of all files passed to the action input

[kB] - will be replaced by *1000 (converts kilobytes to bytes)
[KiB] - will be replaced by *1024 (converts kibibytes to bytes)
[MB] - will be replaced by *1000000 (converts megabytes to bytes)
[MiB] - will be replaced by *1048576 (converts mebibytes to bytes)
[GB] - will be replaced by *1000000000 (converts gigabytes to bytes)
[GiB] - to be replaced by *1073741824 (converts gigabytes to bytes)
[TB] - to be replaced by *1000000000000 (converts terabytes to bytes)
[TiB] - will be replaced by *1099511627776 (converts terabytes to bytes)
Since the expression is applied each time for only one file from the list, the variables [file_sum], [file_max], [file_min] will be the same and always equal to the size of the file being checked.
For example, the expression
[file_sum] > 1[GB]Means: Select all files that are larger than 1 Gigabyte.
Select in the folder
This action is similar to the action Select files except that the action input is not files, but a folder. The contents of the files are scanned and the files/folders in the folder are selected according to the selected conditions.
Create a folder
A folder from the previous actions is input or manually selected from the file system. The name of the new folder is specified.
Output: New folder
Create screenshots/screenlist
On entry:
- files
Selects a profile Screenshot/Screenlist Generator
Output:
- Files -> RAR whole archives
- Files -> RAR volumes
Cut a sample from multimedia files
On entry:
- Files
A profile is selected for Video file cropper
Output:
- Files -> Cropped multimedia file
Multimedia converter
On entry:
- files
The profile is selected Multimedia converter
On exit:
- Files -> Converted multimedia file
Mediainfo template
On input:
- Files
Select profile for Mediainfo
On exit:
- Text -> video information received by template
Calculate MD5
On entry:
- files
On output:
- Text -> MD5 hash string
Change MD5
On entry:
- files
A random byte will be added to the end of the file
Pack into a RAR archive
On entry:
files
RAR archiver profile is selected
On output:
Files -> RAR whole archives
Files -> RAR volume parts
Pack into a ZIP archive
On entry:
- files
ZIP archiver profile is selected
On output:
- Files -> ZIP Archive
Unpack archive
On entry:
- files
Options:
| Delete archives after unpacking |
| Extract to the folder with the archive name |
| File names like the archive |
For a description of the options, see HERE
Output:
- Files -> unpacked files from the archive
- Files -> folder where files were unpacked to if ‘Unpack to folder with archive name’ option was selected
Unpack to folder
On entry:
- files
- folder where the files should be unpacked
Options:
| Delete archives after unpacking |
| Extract to the folder with the archive name |
| File names like the archive |
For a description of the options, see HERE
Output:
- Files -> unpacked files from the archive
- Files -> folder where files were unpacked to if ‘Unpack to folder with archive name’ option was selected
Bulk file renaming
Input:
- files
The profile is selected from Bulk file renaming
Output:
- Files -> renamed files
Move to another folder
Input:
- files
- Destination folder
Options:
| Rename the copied file if there is already a file with the same name |
| Scan and transfer only files from selected folders |
| Move / copy |
Description of options see here
Output:
- Files -> moved files
Remove files
Input:
- Files
It just deletes the files.
Upload to the file exchanges
The automation uses the normal file upload function, so all the options available on the ‘upload’ tab are applicable to it. Namely, the number of restarts of unloading tasks in case of errors and the number of parallel tasks for unloading. They can be set there as well.
Input:
- Files
Options:
- List of file exchangers for uploading
- A template for ‘link’ and a template for ‘Header’. These are used to generate a formatted representation of the link after upload (e.g. for BBCode it will look like
[URL=URL ]Header[/URL]). Description of variables for the template see here - File upload order switch.
Affects the sequence of interleaving of received references.1) All files to each file exchanger 2) Each file to the all file exchangers - Separation type switch for formatted links
New line Space Empty line Without separator - The ‘skip upload errors’ option. In case of errors, the automation plan will not be stopped, just the upload action will be skipped.
Output:
- Text -> Formatted links
File Search
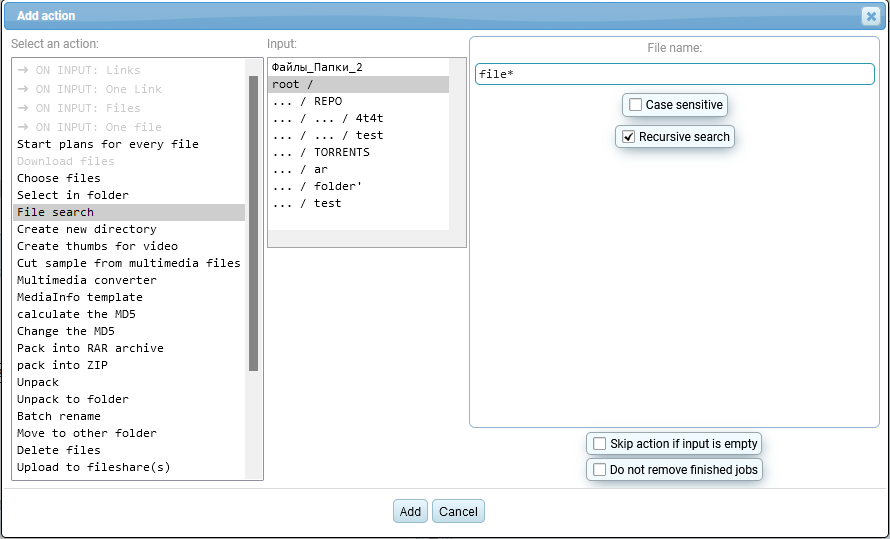
Searches for files by specified mask in selected folders. Returns the list of found files. If ‘recursive search’ option is enabled, searches inside subfolders recursively deep into directories.
Generate text from a template
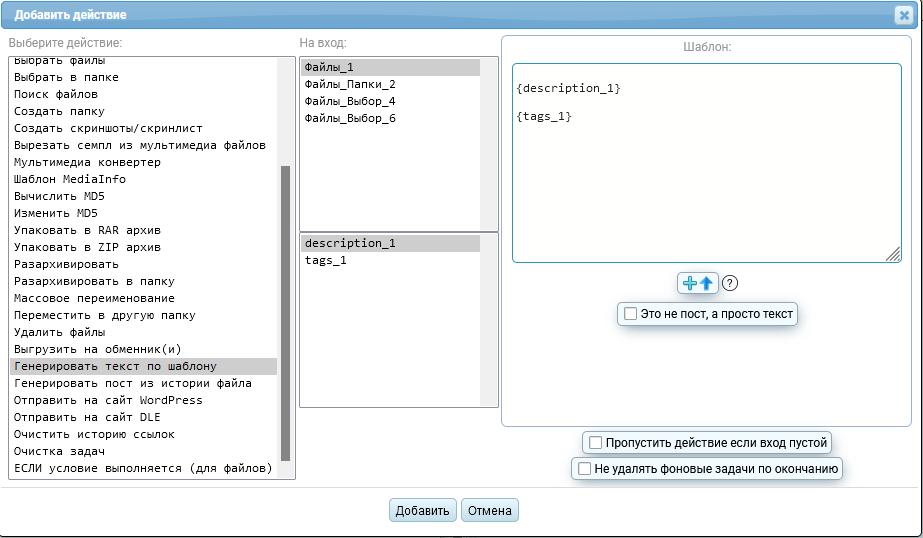
It takes a list of files and a list of text variables as input and generates the output text according to a given pattern.
There are additional variables that can be used in the template:
Available variables:
{url} - inserts a direct link to the file
{file} - inserts file name with extension
{name} - inserts file name without extension
{folder} - inserts a folder name
{folder_fw} - inserts the first word of the folder name
{folder_bsp} - inserts text up to the first space in the parent folder name
If you switch on the option This is ordinal text, not post,then the received text will not be interpreted as a post, but just as another text variable and accordingly the content will not be shown in the post view window after the automation tasks are completed.